- Joined
- Aug 22, 2004
- Messages
- 244
- Reaction score
- 0
Heres what you've all been waiting for, come to think of it so have I!
I'd like to start with the packaging, my first thoughs were, my god thats big!!
It came in a massive box and i mean massive i even put my sister in it")
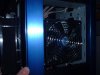
A few chainsaws later i dived into the box and noticed the excellent cooler master packaging (shown in pic 3) and after pulling the monstrosity out I had to have a rest and a coke. Afterward i got to taking off the protective sheets and slung the case onto my bed noticing that the window was protected by plastic and that there was a lack of instructions!!! So onto my next part...
I'd like to start with the packaging, my first thoughs were, my god thats big!!
It came in a massive box and i mean massive i even put my sister in it
A few chainsaws later i dived into the box and noticed the excellent cooler master packaging (shown in pic 3) and after pulling the monstrosity out I had to have a rest and a coke. Afterward i got to taking off the protective sheets and slung the case onto my bed noticing that the window was protected by plastic and that there was a lack of instructions!!! So onto my next part...


") .
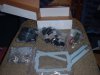
. (i wasnt actually expecting one by the way) this contained; (See pic 2)